42 Microdermal Piercing Models with Procedure, Cost & Care
4.4Kshares
Microdermal piercings, also known as dermal piercings or single-point piercings, are piercings punctured on flat surfaces of the body. They can literally be placed anywhere you want since it is not a major process, which makes them different from other ordinary body piercings.
With a micro dermal piercing, only one end of the ornament emerges from the surface of the skin; the other end is embedded in the dermal layer of the skin. This gives the appearance of having small beads on the surface of the skin.
Microdermal Piercing Description
This type of piercing is becoming popular nowadays because it can be placed on almost any flat surface on the body, allowing decoration of areas that are difficult to pierce with regular piercings. In addition, patterns can be made with multiple dermal piercings.
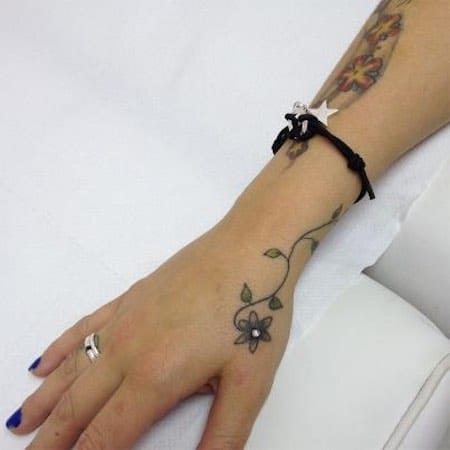
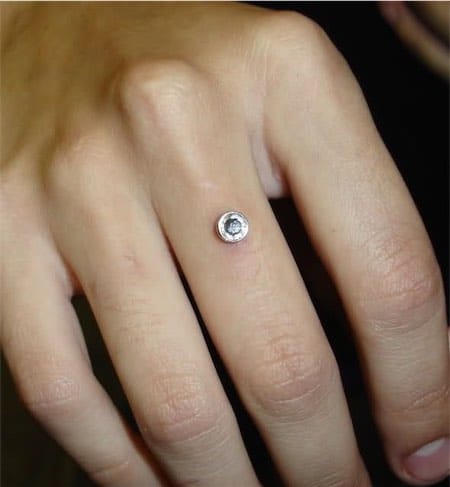
A dermal piercing can also attach an ornament to the finger as a “dermal ring.” A microdermal piercing should not be confused with a surface piercing. Surface piercing might look like a microdermal piercing, but it has a surface bar following the plane of the skin showing two ends.
While a standard piercing would be pierced through the skin, a microdermal piercing as mentioned is just under the skin in the body tissue.
Microdermal Piercing Procedure
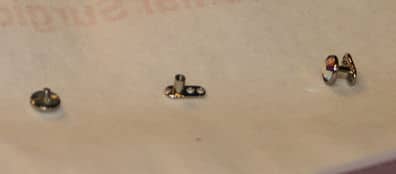
A microdermal piercing procedure is performed on the skin to allow anchor piercing and jewelry to be inserted. This piercing is only visible from the surface of the skin, but as mentioned above; it is different from a surface piercing because it involves embedding a titanium piercing in the microdermal layer of the skin.
The microdermal piercing has several holes to give room for skin growth, hence stabilizing the piercing further. This procedure is performed on any flat skin surface and can be possible in parts of the skin that are less accessible to standard piercing.
Microdermal Piercing and Jewelry
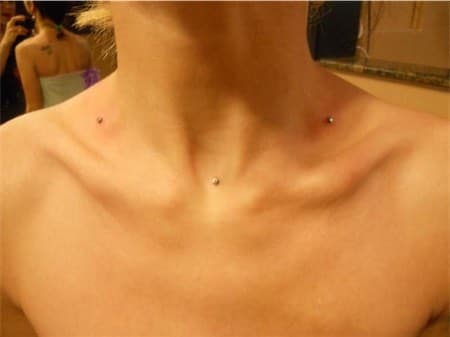
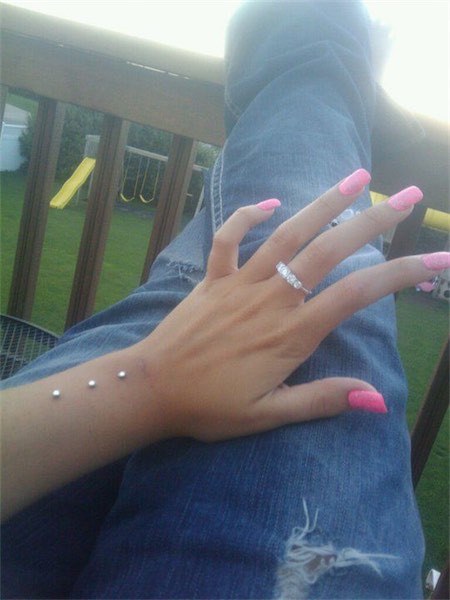
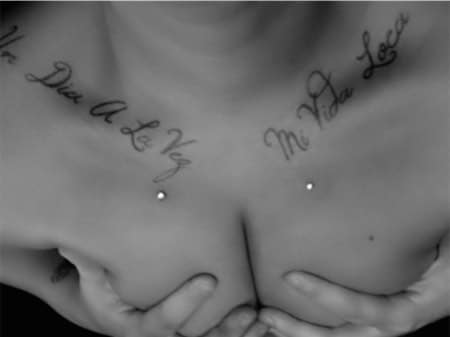
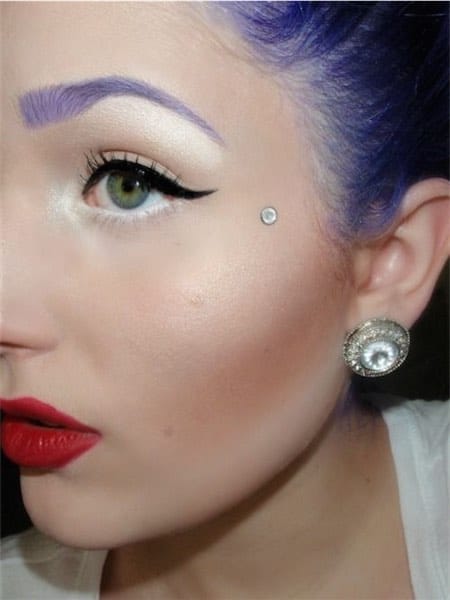
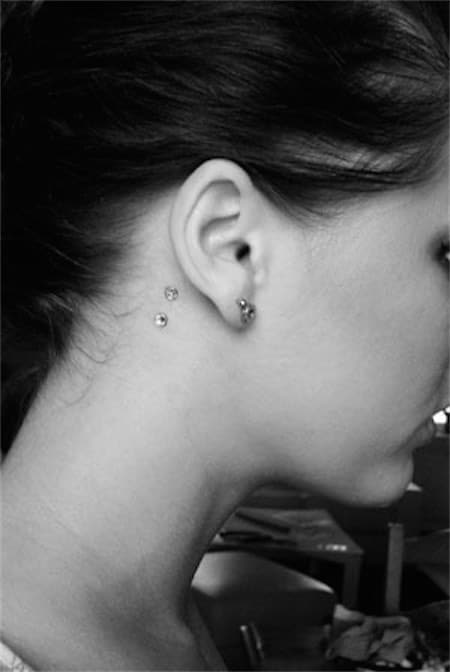
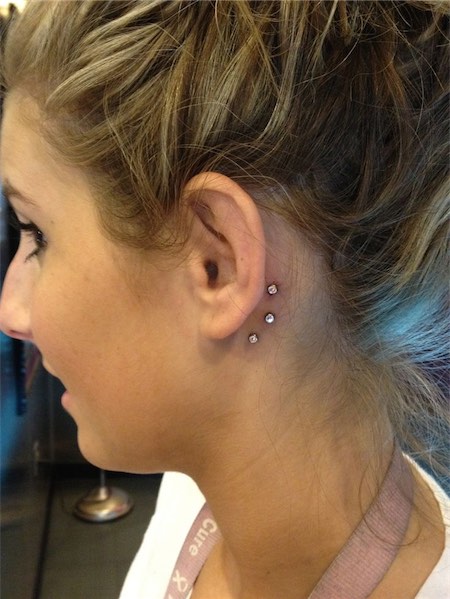
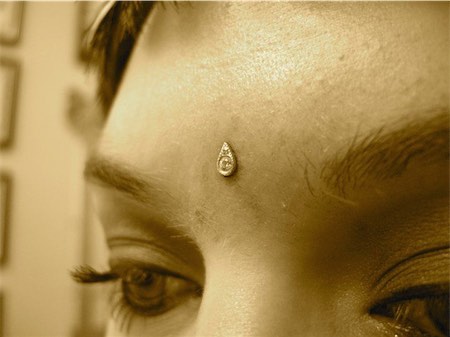
There are several types of microdermal piercings, but the common ones are: Back dermal piercing, finger dermal piercing, ear dermal piercing, chest dermal piercing, face dermal piercing, ear dermal piercing, and hip dermal piercing.
Inserting the Microdermal Piercing
The procedure is usually performed using a dermal punch or needle. When a dermal piercing is done with a punch, the pouch is made in a different way. When using a needle, the pouch is made by separating the skin, but when using a dermal punch, the pouch is made by removing a bit of tissue.
A microdermal punch is less painful, so it is commonly used. The process starts by identifying the point of piercing. The area is then sterilized and marked with a surgical marker. The microdermal punch is then used to remove skin tissues. The anchor is then placed below the skin and a piece of jewelry is placed using surgical forceps. The entire procedure takes about an hour.
Here is an example of the microdermal piercing procedure, as you can see it does not seem to cause a lot of pain to get a dermal piercing.
Do not try to be cheap when it comes to getting microdermal piercings. A good piercing place will probably ask a little more but if your body rejects them, they should heal them up and re-pierce them for free.
The price for a microdermal piercing will range from $40 to $120 in the United States, also depending on how many you will get. The more you will get the cheaper the price normally will be per dermal piercing.
Microdermal Piercing Aftercare
When your microdermal piercing is done, it will be covered with a surgical dressing. This covering must stay on your piercing for at least 48 hours. Keep it clean by using a natural salt solution. Soak a cotton bud and clean around the area. Let it breathe for an hour, then put a new dressing. After a week, you can remove the dressing.
Microdermals can heal completely in about 6 months. This is not extremely long if you compare this to the healing times of a tragus or snug piercing. Do not change your jewelry until it has completely healed. If you have any concerns, you should contact your piercer right away.
Microdermal Aftercare Instructions
Step One Always wash your hands with an anti-bacterial soap before handling your microdermal piercing.
Step Two Clean your microdermal piercing with a homemade sea salt solution. Do this twice a day, in the morning and at night.
Step Three Dry it with a paper towel. Do not use used towels since it can accumulate bacteria and can lead to infection.
Step Four Avoid applying soap directly to the piercing area.
Step Five Use a cotton swab and dab your piercing with a diluted tea tree oil. Tea tree oil is anti-fungal and anti-bacterial, most of all it is natural.
Step Six It is normal for crustings to occur. However, you should avoid taking them out by force. Just use a saline solution in keeping the area clean.
Suggested Aftercare Products For Microdermal Piercing
Instead of spraying, Neilmed Neilcleanse Piercing Aftercare will be poured on your piercing. This is perfect for deep piercings such as microdermal piercings. Aside from piercings, it can also be used for cuts, scrapes, or other wounds. Use it on your chest microdermal aftercare to prevent infection.
The Piercing Care Healing Sea Salts & Botanicals is a medicated sea salt enriched with vitamins, minerals, and other compounds. Best for face microdermal aftercare. It can help in boosting the healing of your microdermal piercing.
Also, it is integrated with aloe vera to alleviate any pain. The vitamin E can enhance your immune system and recovery period. Your piercing is well moisturized due to the tea tree oil. This product uses Dead Sea salt, which includes more minerals compared to the regular sea salt since it’s been sitting around for ages.
Simply use one-fourth of a teaspoon in treating your piercing area and it can last for quite a while.
H2Ocean Piercing Aftercare Spray contains only natural ingredients. It is safe to use on all skin types. It can help in cleansing any type of piercing including microdermal piercing.
Use it every 3 to 4 hours to remove discharges and secretions. H2Ocean is composed of sea salt and lysozyme which can help in healing your piercing faster.
These swabs are perfect for people who are sensitive to products that contain sodium. To clean your piercing, just soak the swab in an aftercare solution and apply it gently on the area. It is dermatologist tested, so you can apply it to any area which requires medication. X-pression swabs are anti-bacterial and anti-microbial. It does not contain any alcohol or sodium.
[amazon fields=”B00414LQVS” value=”button”]
Tips For Taking Care Of Microdermal Piercing
Here some valuable tips that you should definitely take into consideration when getting pierced. A good piercer will also advise you on this.
The piercing can heal within one to three months. During this time, it is important to protect the piercing from being pulled, moved around, or accidentally removed. The tissues around the piercing can be easily irritated.
The piercing may get caught in clothes and towels, so care must be taken when drying the body and when wearing clothes. Clothes that can easily catch the piercing and fabrics with small holes should be avoided.
The piercing can be cleaned using a salt solution, which can be prepared at home by dissolving a ¼ teaspoon of non-iodized salt in one cup of warm water. It can be applied or sprayed on the piercing 2 to 3 times a day.
Dry the piercing using a tissue or a paper towel. A new tissue or paper towel must be used every time the piercing is cleansed, because used towels and tissues may accumulate dirt and bacteria, which in turn, may cause infection in the piercing.
A person wanting to remove a dermal piercing should get help from a professional piercer; removing it on one’s own is not recommended. The area of the piercing is gently massaged to dislodge the piercing from its location. If the piercing is old it may be more difficult to remove because tissues might have grown on the plate area. You can also research microdermal removal aftercare for more information.
Microdermal Piercing Risks
The primary risk of dermal piercing is tissue damage, especially when the piercing is not done by a professional piercer. The dermal layer contains nerves and blood vessels, which may be damaged when the piercing is not installed properly.
If the piercing is installed too deeply in the skin, it may pull the skin layers together, which is called embedding. If the piercing is too shallow, it can migrate.
During the several months it may take for the piercing to heal, it is important to avoid twisting or pulling the piercing or snagging it on clothing or towels. Another risk is the development of bacterial infection. Infection can happen when equipment used for piercing is not well sterilized, or when the piercing is not cleaned regularly.
An infection of the deeper layers of the skin and fat, called cellulitis, may be caused by airborne bacteria infecting the piercing location while the procedure is done. An infection is manifested by inflammation of the surrounding area: redness, rash, pus, and/or pain.
Another risk is that the piercing may be rejected by the body, causing an immune response in the area of the piercing. It is recommended that the piercings be made with titanium rather than stainless steel. Titanium is often used in surgeries and medical procedures because its potential for rejection by the body is low.
Rejection is in most cases normal to happen but the time can vary between 6 months and 6 years. It all comes down to doing your research and not making any rash decisions.
Dermal Piercing Frequently Asked Questions
Microdermal piercings represent a unique way you can express yourself and enhance your appearance. Many of our readers still have a few remaining questions in mind at the end of our articles, so we have compiled those here for you. Here are our top three most asked microdermal piercing questions:
Is a microdermal piercing permanent?
The microdermal piercing is not permanent. In fact, it can be removed at any time you wish. However, it is not something that you will be able to remove yourself. Be prepared to make another trip to your piercing shop when you are ready to remove it.
Will a microdermal piercing leave a scar?
In most cases, a microdermal piercing will leave a scar. However, this does often depend on the sensitivity and type of skin involved. If you are prone to scarring for minor bumps and bruises, you can definitely expect a scar to result from an old dermal piercing, as well.
Is there any way to reduce the risk of rejection of dermal piercings?
Talk to your piercer about your options to help lower your risk of rejection. Factors like the width (or gauge) of your jewelry and the depth of your piercing can affect your likelihood of rejection.
Dermal Piercing Final Thoughts
If you select a good piercer who you feel comfortable with, do your research on how to take care of your microdermal piercing after you have received it and consistently do it, then all the risk will be reduced to a minimum. What is your experience with getting a microdermal?
Hello! My name is Emily and I obsessed with piercings (and tattoos) since I was a little girl of 6 years old. I was fortunate enough to make my passion my work after meeting my amazing husband Jeffrey who owned his own tattoo shop. I just recently finished my internships at some of America’s most famous piercing shops and a dream to start something together was born. After falling in love with each other (and each other’s piercings and tattoos) we decided to expand his tattoo shop and I got to manage my own piercing shop in the same space! I’ve never been so happy being able to share my love for piercings through my shop and this blog I started back in 2013. We love to share models and inspiration, so feel free to email me your suggestions, pictures or if you just want to say hi!